Paint
Status: In trial
Draw and edit pictures (Lab): selections, levels, masks, clone stamp, history.
About this app
Paper and paint on the screen, and a small workshop for photos. Draw on a white sheet with a brush, pencil or eraser, or open a photo, pick just the part you want, crop it, set its brightness and colours, remove specks and mark it with arrows and words. A photo you opened is never overwritten silently: the first save offers "Save a Copy". Closing does not lose the work; the next time you open Paint it continues.
At a glance
In one line: Draw pictures and fix photos (lab app).
The screen
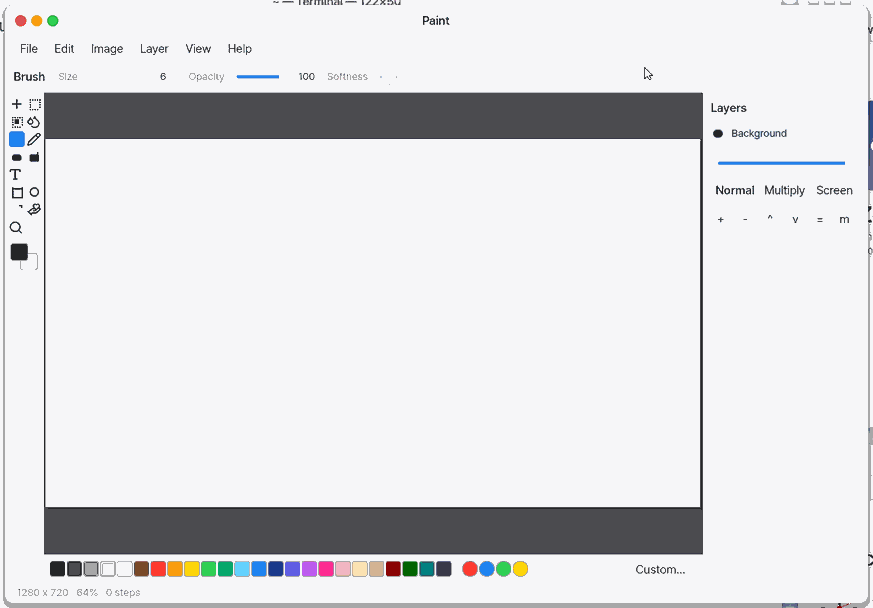
- Tool bar on the left: brush (B), selection, stamp and more
- Color row at the bottom: press a color
- Panel on the right: layers (one transparent sheet each)
- "History" at the bottom right: your steps pile up, and a press goes back to that time
Task 1. Make a new picture
- Open the File menu
- Press "New"
- Press "Screen size"
Say: "Make a new picture"
Task 2. Draw
- Press the brush tool (B)
- Press a color in the bottom row
- Drag on the paper
Say: "Draw a red circle on the picture"
Task 3. Save
- Press
Ctrl+S - Type a name
- Press "Save"
Say: "Save the picture as a copy"
Basics
A photo is a grid of tiny coloured dots (pixels). A 12-megapixel photo is 4000 dots across and 3000 down. Everything a paint program does comes down to "which dots, and which colour".
- A selection is a fence around "only here". Every dot carries a number from 0 (outside) to 255 (inside), so an edge can be half in (soft). The moving dotted line ("marching ants") is that fence.
- Layers are clear sheets stacked on each other. Painting on an upper sheet does not touch the photo under it. The blend mode (Normal, Multiply, Screen, Overlay, Darken, Lighten, Difference) decides how a sheet's colours mix with the ones below.
- A mask is a black-and-white cover fixed to a layer: white shows, black hides. Unlike the eraser it deletes nothing, so painting it white again brings everything back.
- An adjustment (Levels, Curves, Hue/Saturation) is a table "this brightness becomes that one" applied to every dot; a filter (blur, sharpen) mixes each dot with its neighbours.
- File formats: PNG keeps every dot exactly while packing them smaller, JPEG makes photos small by dropping what the eye hardly sees, WebP is the web's format that can do either.
To learn more, press ⚡ "Teach me the basics of this app".
How to use it
- Draw: pick the Brush (B) in the tool column, click a colour in the strip at the bottom and drag over the sheet.
[]set the size, 1-0 the opacity.Ctrl+Ztakes a stroke back. - Select: rectangle (M), ellipse (
Shift+M), lasso (L - draw around by hand;Shift+Lis the polygonal lasso, click the corners), magic wand (W - click a colour and get everything similar). HoldShiftwhile selecting to add,Altto subtract, both to keep only the overlap. Select > Feather (Shift+F6) and Color Range are in the menu too. - Resize or turn: select, then
Ctrl+T(Free Transform). Drag a corner to scale, outside the box to turn, inside to move.Enterapplies,Esccancels. - Brightness and colour:
Ctrl+LLevels,Ctrl+MCurves,Ctrl+UHue/Saturation, Brightness/Contrast. Moving a slider previews on the picture at once; "OK" applies.Shift+Ctrl+Udesaturates (grey),Ctrl+Iinverts. - Filters: Filter > Gaussian Blur, Unsharp Mask, Add Noise. With a selection only the selection changes.
- Remove specks: Clone Stamp (S) - hold
Altand click where to copy from, then paint over the spot. Spot Healing (J) - one click on a speck fills it from around it. - New picture: File > New: "Screen size" (the default: the white sheet fills the visible picture area) or "Other size..." (like 1280x720). Settings > Paint > New picture size changes the default. An opened photo keeps its own size and is shown fitted to the area.
- Layers: in the right panel the labelled buttons "New Layer", "Delete", "Up", "Down", "Duplicate", "Merge" (hover for a hint); drag a row to reorder; the "Opacity" slider makes the layer see-through; on a phone the stacked-squares button in the top bar opens and closes the layer panel; press "‹ Normal ›" for the blend mode; "Mask" adds a mask; "Lock" (
/) keeps transparent dots unpainted. - History: the History list at the bottom right names every step. Press a row to go back to that moment; the top row "Original" is the picture as it was opened.
- Open and save: Photos > Edit, right-click in Files > "Edit in Paint", drag a picture from Files or the desktop onto the Paint window, or
Ctrl+O.Ctrl+Ssaves (.zpaint keeps the layers),Shift+Ctrl+Alt+Sexports PNG or JPEG. - Canvas size: Image > "Canvas Size..." (like 1600x900) makes the sheet bigger or smaller without scaling the picture: it stays at the top left, new room is white paper, a smaller size cuts at the right and bottom (Ctrl+Z gives it back). "Resize..." is the one that scales.
- Narrow or short windows: the colour strip shrinks its swatches to fit beside "Custom..." and the layer panel; in a short window the layer panel scrolls with the mouse wheel so every button stays reachable.
Try it yourself
Try it yourself: in a new picture draw a filled red rectangle (U, "Filled"), then press W and click inside it: the dotted line runs around the rectangle and the status bar shows the selection's size. Ctrl+T, drag a corner out, Enter - then press "Original" in the History list to get back to the start.
How it works
- A picture is a stack of layers. Each layer holds a colour and a transparency per dot; the picture you see is the layers laid over each other from the bottom up (compositing). A blend mode is one line of arithmetic for "how the upper colour meets the lower one": Multiply multiplies them (darker), Screen the reverse (lighter), Overlay multiplies in the darks and screens in the lights.
- A selection is a sheet of numbers, one per dot. A rectangle is remembered as four numbers; the lasso, magic wand and ellipse build a 0-255 sheet the size of the picture (a mask). Brushes, filters and adjustments all multiply by it, so nothing outside the selection changes. Feather blurs that sheet, which makes the edge half-transparent.
- The magic wand starts at the dot you clicked and spreads like water to neighbours whose colour is within the Tolerance (untick "Contiguous" and it picks that colour everywhere in the picture).
- Adjustments preview, then apply. Moving a slider computes on a copy and leaves the original alone. Big photos are computed a few rows at a time, so the window never stops and shows "Working 40%". Cancel throws the copy away.
- Free Transform lifts the piece and, on every drag, computes again from the untouched original, so scaling up and down many times does not blur it.
- A mask is a grey sheet next to the layer. While the mask is being edited (a blue ring around the small square in the layer row) the brush paints grey levels on the mask instead of colour.
- History (undo) keeps how things looked before in small tiles (64x63 dots) and puts them back. Keys, menus, touches and the assistant all go one way, so one Undo takes back any of them.
- Why it was made this way: keeping the original safe (copies, masks, undo) has to be the default so a mistake loses nothing. Previews are computed in slices so a big photo never freezes the screen, and the dotted line redraws only the selection's box, so an idle Paint leaves the computer resting.
- Think of layers as stacked clear sheets, a mask as a paper cover taped on a sheet, and a selection as masking tape.
Technical details
Technical details
- Core
src/gui/paint_core.c(document, layers, selection, history, drawing, filters, PNG, .zpaint): portable integer-only code with a host test,tests/paint_host.c(also under ASan). The window,src/gui/paint.c, is the same code on NanumOS and on mobile (web). - Size: up to 8192 dots on a side and 16 million dots a picture. Buffers over 1 MiB come from the high memory zone (direct map).
- Selection:
SEL_RECT(x, y, w, h) orSEL_MASK(w*h bytes). Lasso and polygon fill a polygon in 1/16-dot coordinates with anti-aliased edges; feather is three box blurs (a Gaussian). The ants redraw only the selection's box, 3 times a second. - Adjustments and filters are jobs:
pc_preview_stepdoes a few rows at a time; OK records one step. Levels (input black/white, midtones, output), Curves (three points, Hermite), Hue/Saturation (HSL), Gaussian blur (three boxes, premultiplied alpha), Unsharp Mask (amount, radius, threshold), Noise. - History: painting swaps 64x63 tiles; size and layer changes swap the whole state (reference-counted buffers). Budget 28 MiB; the oldest steps go first.
- Files: PNG (RGBA), JPEG (quality 40-100), BMP and WebP (still) open,
.zpaint(a zip of doc.json + layerN.png + maskN.png). Pictures are decoded in user space byu imgview(stb_image; WebP by zwebp,user/webp). - Assistant (
paint_do): open, new, select (rectangle, ellipse, lasso, magic wand, color range, feather), crop, resize, rotate, adjustments (adjust_pro: levels, curves, hue_saturation, brightness, desaturate, invert), filters (blur, sharpen, noise), free transform, blend mode, mask, lock, clone, heal, history goto, undo, save a copy, export. Only overwriting the original (save_over) shows an approval card first.
FAQ
Why does it open on a wall of paintings?
The first time you open Paint, twelve well-known paintings sit over the blank paper (The Starry Night, Water Lilies, Girl with a Pearl Earring, The Great Wave off Kanagawa, The Birth of Venus, The Kiss, Mona Lisa, The Night Watch, Sunflowers, Impression, Sunrise, Ssireum, Dano Pungjeong). Tap one to open it and paint over it, or tap Blank paper to start as usual. To hide them, turn off Settings > Sample Files > "Show the painting gallery in apps".
How do I brighten only one part?
Select it with M, L or W, then use Ctrl+L (Levels) or Brightness/Contrast. Nothing outside the selection changes. If the edge shows, feather it first with Shift+F6.
What is the difference between the eraser and a mask?
The eraser really removes dots. A mask only hides them: paint the mask white again, or delete the mask, and they are back.
How do I go back several steps?
Press that row in the History list on the right. The top row "Original" is the picture as it was opened. Painting something new after going back drops the steps after it.
Do big photos open at full size?
Up to 8192 dots on a side and 16 million dots, yes. Bigger ones open scaled down with the note "Opened smaller to fit memory."
Does the moving dotted line keep the computer busy?
It redraws only the selection's box, three times a second - not the whole picture - so an idle Paint does very little.
Try this
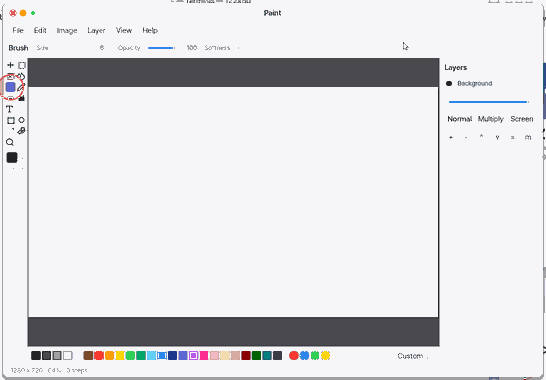
1. Draw
- Pick the Brush (B) on the left, click a colour in the strip at the bottom, then drag over the white sheet. Press Ctrl+Z to take a stroke back.
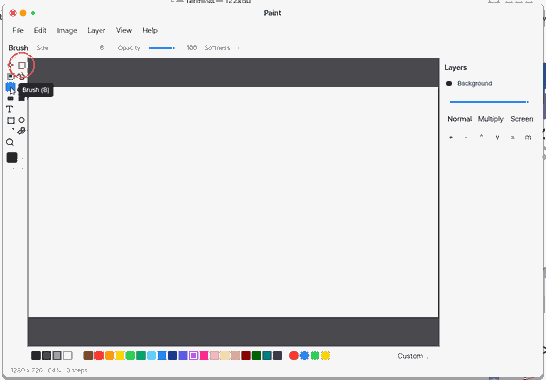
2. Fix a photo
- In Photos press "Edit", or right-click a picture in Files and choose "Edit in Paint". Press M and drag over the part to keep, then "Image > Crop to Selection".
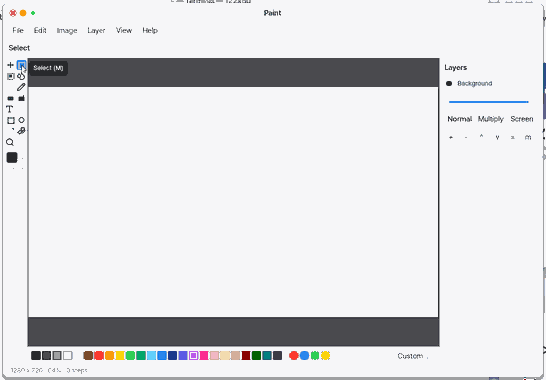
3. Mark it up and save
- Press U for an arrow, T for text (Korean works, Enter sets it down). Press Ctrl+S and choose "Save a Copy": the original stays as it was.
Shortcuts
| Key | What it does |
|---|---|
| V M C I B E G T U H Z | Tools: move, select, crop, eyedropper, brush, eraser, fill, text, shapes, hand, zoom |
| Shift+M, L, Shift+L, W | Elliptical selection, lasso, polygonal lasso, magic wand |
| S, J | Clone stamp (Alt+click the source), spot healing |
| Shift, Alt, Shift+Alt (while selecting) | Add to, subtract from, intersect with the selection |
| Shift+B, Shift+U | Pencil, next shape (line, rectangle, ellipse, arrow) |
| X, D | Swap colours, default colours |
| [ ], 1-0 | Size, opacity |
| Ctrl+Z, Shift+Ctrl+Z | Undo, redo |
| Ctrl+A, Ctrl+D, Shift+Ctrl+I, Shift+F6 | Select all, deselect, invert selection, feather |
| Ctrl+T | Free transform (Enter applies, Esc cancels) |
| Ctrl+L, Ctrl+M, Ctrl+U, Shift+Ctrl+U, Ctrl+I | Levels, curves, hue/saturation, desaturate, invert |
| Ctrl+X, Ctrl+C, Ctrl+V | Cut, copy, paste |
| Ctrl+J, Shift+Ctrl+N, Ctrl+E, Ctrl+], Ctrl+[ | Duplicate layer, new layer, merge down, move up, move down |
| / | Lock transparency |
| Ctrl+0, Ctrl+1, Ctrl++, Ctrl+- | Fit, 100%, zoom in, zoom out |
| Ctrl+S, Shift+Ctrl+S, Shift+Ctrl+Alt+S | Save, save as, export (PNG, JPEG) |
Settings
Settings > Apps > Paint: JPEG quality, new picture size, pixel grid when zoomed in.
What it cannot do
- Pictures over 16 million dots (8192 on a side) open scaled down. Animated WebP does not open.
- No adjustment layers, smart objects, PSD reading or pressure pens yet. Pictures pass to other apps as a picture file's path.
NanumOS 0.1.8349 · 2026-11-16