USB Maker
Status: Ready
Make a boot USB, write an image to a stick, or save a stick as an image.
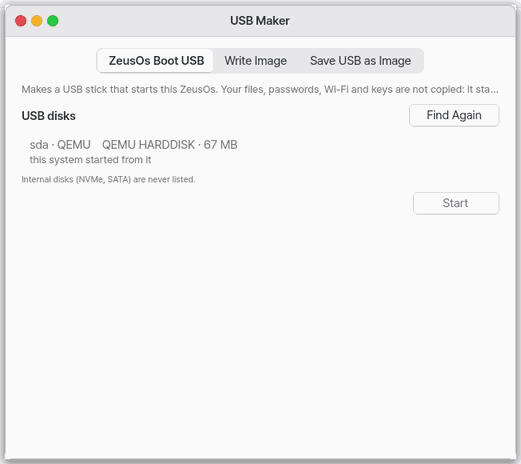
About this app
An app that makes a NanumOS boot USB, writes a disk image onto a USB stick as it is, and saves a USB stick as an image file. It reads or writes the whole of one USB stick at once, like copying a photograph. Use it in the desktop edition; in the web browser (lite) it only shows a message that a USB stick cannot be written.
Basics
A boot USB is a stick that loads the operating system when the computer starts. A disk image (.img, .iso, .img.gz) is the content of one disk frozen into a single file, so writing it onto a USB stick makes an identical stick. Writing erases what was on the stick, so the app always asks once first.
How to use it
- Choose the job on the tabs at the top: “NanumOS boot USB”, “Write image” or “USB to image”.
- Plug in the USB stick and press “Rescan”; it appears in the USB storage list with its name and size.
- Select the stick. For Write image and USB to image also choose the file with “Choose…”.
- Press “Start”; “Erase this USB?” appears once, and “Erase and write” begins. A bar, the speed and the time left are shown.
- When done, it reads the stick back to check and shows “Done — read back and verified” with the first characters of the sha256.
Try it yourself
Try it: plug in a USB stick and press “Rescan” just to see it in the list. Before pressing “Start”, make sure nothing on the stick needs to be kept.
How it works
- The list shows only plugged-in sticks. The stick you booted from and a stick holding your files are marked “Skipped” with the reason and cannot be selected; internal disks (NVMe, SATA) are not listed at all.
- A boot USB does not carry your files, passwords (vault), Wi-Fi or keys. The new stick starts as a freshly set-up system.
- After writing, the stick is read back to check it.
- If you pull the stick out while writing, you see “Failed — the USB was removed” and the computer is untouched. Plug it in again and press “Retry” to write from the start.
.xzand.zstimages cannot be unpacked yet; convert them to.imgor.img.gz.
Technical details
In a terminal use mkusb list, mkusb nanumos sdb, mkusb write file.img sdb and mkusb read sdb file.img. The dd form (mkusb if=file.img of=/dev/sdb) also works, and in a terminal you must type the device name (sdb) yourself before anything is erased. The starting folder of the file chooser is set in Settings. The check reads what was written back from the stick and compares its sha256.
FAQ
My USB stick is not in the list
Plug it in and press “Rescan”. The stick you booted from, a stick holding your files and internal disks cannot be selected.
Will the contents of the stick be lost
Yes. “Erase this USB?” appears once before writing, and writing starts only after you press “Erase and write”.
Does it work in the phone browser
No. A browser cannot write to a disk, so it works only in the desktop edition.
At a glance
In one line: An app that makes a boot USB, burns an image to a USB, or saves a USB as an image.
The screen
- Three tabs on top: NanumOS boot USB, Burn an image, USB to an image
- USB storage list: plugged-in USBs with name and size
- Find again button: looks for a newly plugged-in USB
- Start button: asks once, then writes
Task 1. Choose what to do
- Open USB Maker
- Press one tab on top
Say: "Open USB Maker"
Task 2. Find your USB
- Plug in the USB
- Press Find again
Say: "Open the app that makes a boot USB"
Task 3. Write
- Choose the USB in the list
- Press Start
- Press Erase and write
Say: "Open the app that burns images"
Try this
1. Pick the job
- The tabs at the top pick Boot USB, Write Image or Save USB as Image.
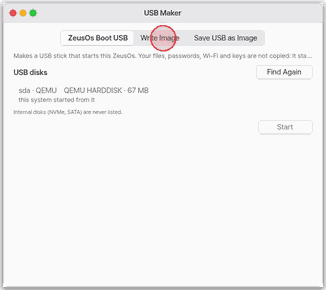
2. Find the stick
- Plug the stick in and press "Find Again".
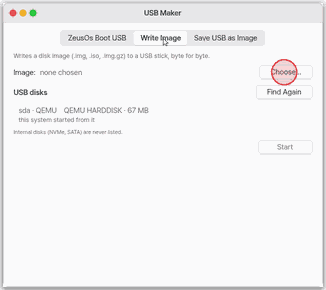
3. Write
- Pick the stick and press "Start": it asks once, then writes.
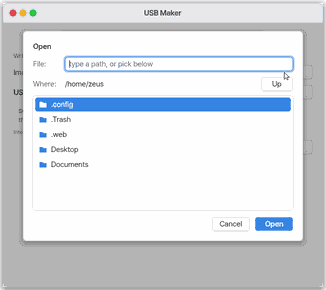
Shortcuts
This app has no shortcuts of its own.
Settings
Nothing to set.
What it does
USB Maker does three things: make a boot USB that starts the NanumOS you are running, write a disk image (.img, .iso, .img.gz) to a USB stick byte for byte, and save a whole USB stick as an image file.
A boot USB gets none of your files, passwords (Vault), Wi-Fi or keys. The new stick starts like a first boot.
Screen and buttons
The tabs at the top pick the job: NanumOS Boot USB, Write Image, Save USB as Image.
USB disks lists the plugged-in sticks with name, maker and size. The stick this system started from and the stick holding your files are shown as excluded, with the reason, and cannot be picked. Internal disks (NVMe, SATA) are never listed. After plugging one in, press Find Again.
Write Image and Save USB as Image pick the file with Choose… (the starting folder is in Settings).
Start asks once: "Erase this USB?". Erase and Write starts; a bar, the speed and the time left are shown. At the end the stick is read back and checked: "Done — read back and checked" and the start of the sha256.
If the stick is pulled out while writing, "Failed — the USB disk is gone" appears and the computer is fine. Plug it back in and press Again to start over.
In the Terminal
mkusb list, mkusb nanumos sdb, mkusb write file.img sdb, mkusb read sdb file.img. The Linux dd form (mkusb if=file.img of=/dev/sdb) works too. On a terminal you type the disk's name (sdb) before anything is erased.
Overview
Make a boot USB, write an image to a stick, or save a stick as an image.
Try this
1. Pick the job
- The tabs at the top pick Boot USB, Write Image or Save USB as Image.
2. Find the stick
- Plug the stick in and press "Find Again".
3. Write
- Pick the stick and press "Start": it asks once, then writes.
What it cannot do
.xz and .zst images cannot be unpacked yet (use .img or .img.gz). A web browser (lite) cannot write USB disks.
NanumOS 0.1.8349 · 2026-11-16