Video Retouch
Status: In trial
Join and cut the videos you recorded, add a title and music, and export.
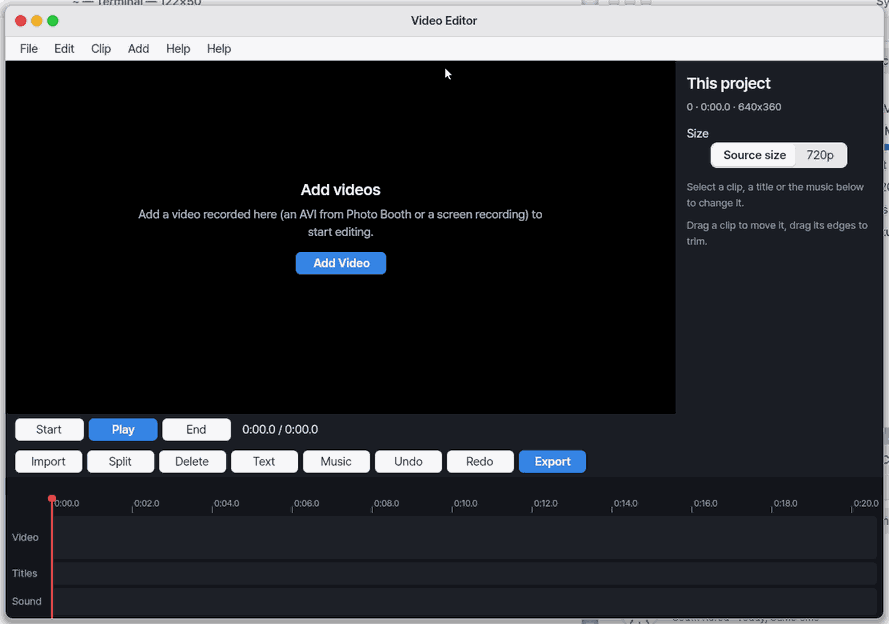
About this app
Video Retouch joins and cuts recorded videos, adds titles, music and your voice, and exports a new video. The original files are never touched. This app is still being tested (Lab stage). Automatic captions, reading text aloud and MOV/HEVC export work only in the Mac app; elsewhere the app says "Not yet on this device".
Basics
A video is many pictures flipped quickly with sound laid over them. Editing is like cutting that film with scissors and taping the pieces together in a new order. This app does not cut the film itself; it only writes down "from where to where, in what order", and builds a new video from that record when you export. So a wrong cut can be undone with Ctrl+Z and the original stays safe.
How to use it
- Add videos, pictures or music with
Ctrl+I(File › Import…), drag them into the editor from the Files app, or press a sample in an empty project. Adding another joins it at the end, and dragging a bar on the timeline changes the order. - Press
Ctrl+Bwhere you want to cut, select the part you do not need and pressDelete. Dragging a bar's end also shortens it. - Add a title and background music from the "Text" and "Music" tabs on the left.
- Export with
Ctrl+E. When it finishes, press "Open". - For a shot with a face, select the clip and press "Retouch" (on a phone: "Retouch" in the bottom row; on a computer: the "Retouch" tab of the Video panel on the right). One press of "Natural" is enough; the "Smooth skin", "Brighten skin" and "Sharpen" sliders go further, and "Reset" gives the clip back as it was.
Try it yourself
Try it yourself: In an empty project press a sample to add a video, split it in the middle with Ctrl+B, delete one side, add a title and export.
How it works
- Your edit is a "piece list". Each piece records the source file, the part used and the volume; text and music are recorded the same way.
- Keys, mouse and the assistant all go through one single command, so there is a single undo history.
- That record is saved to the project file every 2 seconds by itself, and the video itself is not copied. Reopening the app opens the project you were working on.
- MP4 and MOV cannot be cut as they are, so a working copy is made in the background and a percentage is shown meanwhile.
- Retouch finds the skin-coloured parts of every frame and smooths and brightens only those; Sharpen works on the edges of the whole frame. The preview and the export use the same calculation (the exported file is retouched too).
- While it plays, the red line (the playhead) follows the clock of the sound you hear. It starts when the sound starts and moves a little every screen refresh, so it never drifts from the sound - like a player keeping time with the conductor. On a phone the line stands in the middle and the timeline glides under it.
Technical details
- The project file is a small JSON (
<first video name>.vedit.json); undo keeps 40 copies of the whole project. Sourcesrc/gui/vedit.c(window) andsrc/gui/vedit_core.c(model and export). - While playing, only what moved is redrawn: each refresh the timeline (phone) or a strip around the line; a new video frame is spread over three refreshes - its JPEG bit stream and half the pixels read ahead while the last one is on screen, the other half and the composing, then drawing it - so no refresh does all of it. Playhead = play start + the sound's
currentTime(more than 80 ms off: set at once; less: 1/8 per refresh). Testtests/weblite_vedit_playhead.py, numbersdocs/qa/VEDIT-PLAYHEAD.md.
FAQ
How do I undo a wrong cut
Press Ctrl+Z. The original file is never touched, so you can undo as often as you like (the history holds 40 steps).
I added an MP4 and it says "Converting for editing"
MP4 and MOV are not stored one picture at a time, so they cannot be cut as they are; a working copy is being made. A file converted once goes in at once next time. If the video decoder has not been downloaded yet, open that video in the Video app, press "Get", and import again.
Captions are not made automatically
Automatic captions work only in the Mac app. Elsewhere only captions you type yourself work, and the sound is not sent anywhere.
Which files can I add
At a glance
In one line: An app that cuts and joins videos and exports a new one. Your original stays as it is.
The screen
- Preview on top: the picture at the current spot
- Play buttons and the tool row in the middle
- Timeline below: video pieces, text, sound lines
- Red vertical line: the spot you are looking at (playhead)
Task 1. Add a video
- Press
Ctrl+I - Choose a video
Say: "Put a sample video in"
Task 2. Cut off what you don't need
- Press
Ctrl+Bat the spot to cut - Press the part you don't need
- Press
Delete
Say: "Cut the first 3 seconds"
Task 3. Export
- Press
Ctrl+E - When it finishes, press Open
Say: "Export the video"
Try this
1. Join videos
- Drag a video, picture or song onto the editor, pick one with File › Import… (
Ctrl+I), or click a sample tile under an empty project. Add another and it joins after the first; drag the bars in the timeline to change the order.
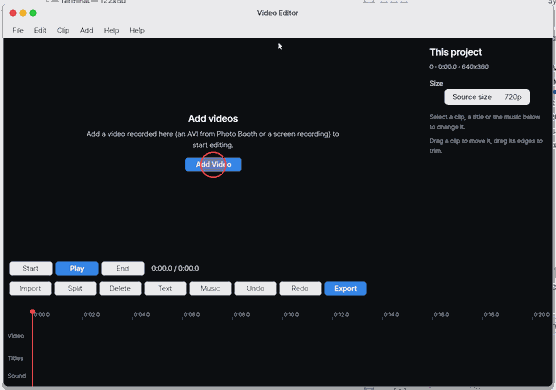
- Drag and drop: drag a video, picture or song from Files or the desktop onto the editor. Drop it between two pieces on the timeline and it goes there.
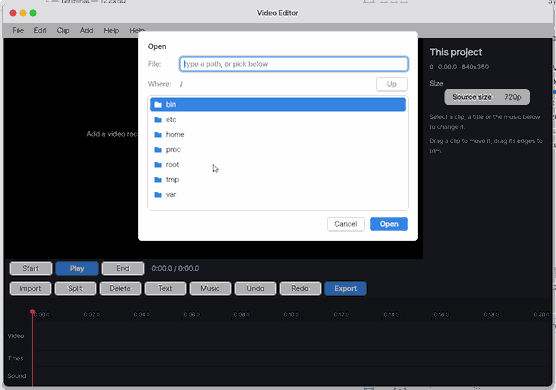
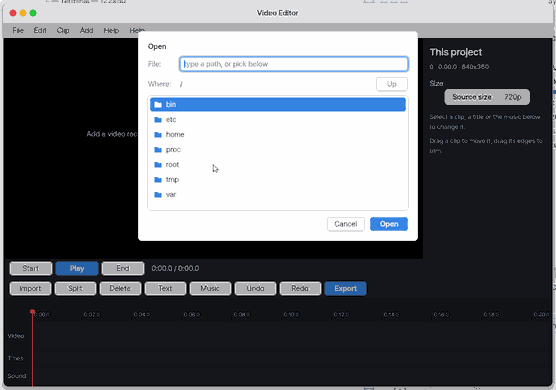
- File › Import… (
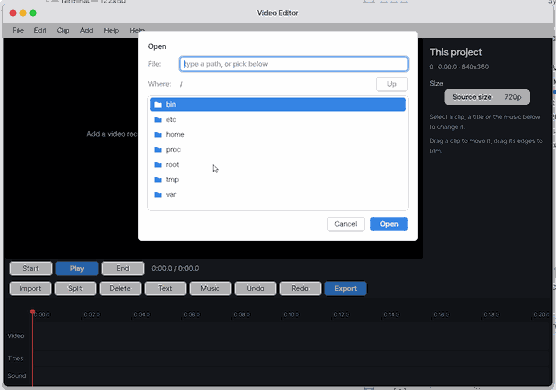
Ctrl+I,Ctrl+O): the Open sheet starts in Movies, with Movies · Pictures · Music · Samples · Home (and "Recent", the folder you used last) as buttons on top — one click, no paths to type. The line at the bottom lists the formats that can come in. - The samples strip: an empty project shows a big "Drag a video, a picture or music here [Import…]" area with Samples and your videos tiles under it. Click a tile once (or twice) and it comes in once.
Tab/←→choose one andEnteradds it.
What happens: an AVI goes in at once; an MP4 / MOV shows "Preparing the video for editing… 40%" and then goes in (a file done once goes in at once next time); a picture becomes a 3-second still piece; music becomes the background music. Add another and it joins after the first; drag the bars in the timeline to change the order.
If the video decoder has not been downloaded yet, MP4 / MOV cannot be prepared for editing. Open that video in Video, choose Download, then import it again.
2. Trim and split
- Drag the left or right end of a bar and the piece gets shorter. The original file stays as it was.
- At the place you want, press
Ctrl+B(or Split) and the piece becomes two. Click the one you do not need and pressDelete; the pieces after it move up. Made a mistake?Ctrl+Z.
3. Add a title and music
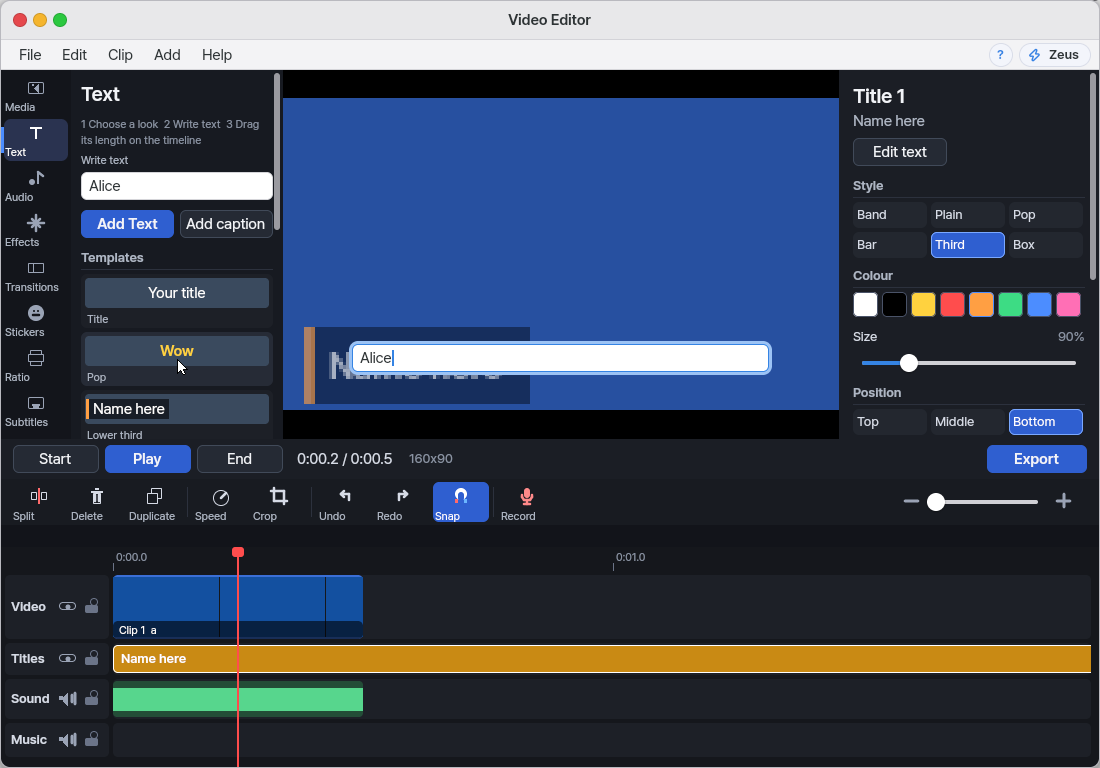
- Open Text and choose a style card. A text piece appears at the playhead, ready to type directly on the preview. The Write text field on the left shows the same words. Double-click the timeline text piece to type inside it again. Press
Escor click outside to finish; empty text is removed. Drag the end of the piece to change its length. Right-click the text bar for Edit Text, Duplicate, Length (seconds), or Delete. Select it and pressDeleteto remove it;Ctrl+Zrestores it.
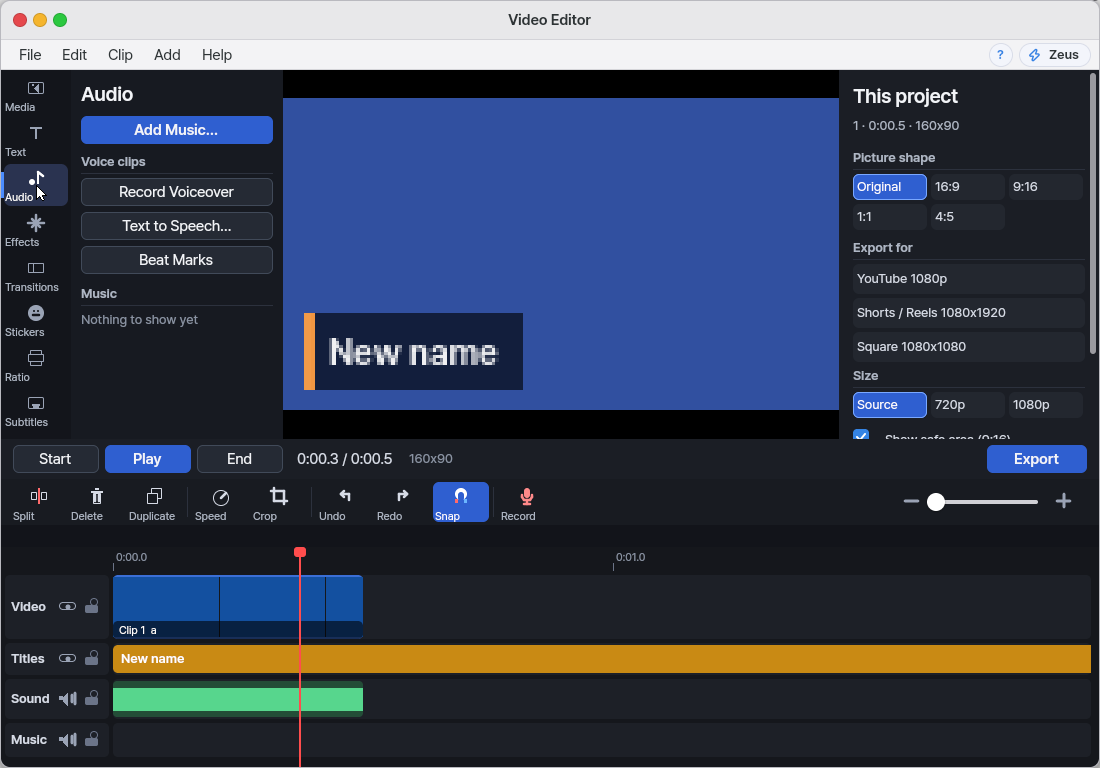
- Press Music and pick an MP3, OGG, FLAC or WAV file; it plays under the whole video. Set its volume in the panel; you can also turn a piece's sound down or off.
4. Export
- Press Export (
Ctrl+E, the button at the top right). The export window opens with, from the top: Name · Save to · Resolution (as the project, 720p, 1080p, 2K, 4K) · Bit rate (lower, recommended, higher) · Encoder (H.264, HEVC) · Format (MP4, MOV, AVI) · Frame rate (24, 25, 30, 50, 60); the line under them shows the size, the rate and about how big the file will be. Press Export (orEnter): a progress bar shows and the window stays usable. When it is done the new file is in the folder you chose and an Open button appears. If the name is taken, " 2" is added: an existing file is never overwritten.Esccloses the window.
You can also tell the assistant "join the two videos, cut the first 3 seconds, add a title, put music under it and export". It does the same steps as the buttons, and you can undo them with Ctrl+Z right there. Only an export that would overwrite an existing file asks you first.
Shortcuts
| Key | What it does |
|---|---|
Space | Play / pause |
J K L | Back / stop / forward |
← → | One frame back / forward (with Shift: one second) |
Home End | Start / end |
Ctrl+N Ctrl+I | New project (the open one stays saved, in Open Project) / import media |
Ctrl+B | Split at the playhead |
Q W | Trim the start / the end to the playhead |
Delete | Delete the selected item (with nothing selected: the piece under the playhead) |
I O | Mark in / out (Delete then cuts between them) |
Ctrl+C Ctrl+V Ctrl+X Ctrl+D | Copy / paste / cut / duplicate |
Ctrl+Z Ctrl+Shift+Z | Undo / redo |
Ctrl+= Ctrl+- | Zoom the timeline in / out |
Ctrl+E Ctrl+S | Export / save the project |
M T | Add a marker / add text |
Alt+F | Freeze frame (a 3 s still) |
Ctrl+A Esc | Select all / clear the selection (Ctrl / Shift + click: several clips) |
↑ ↓ | Previous / next clip edge |
R | Record a voiceover at the playhead (starts after 3-2-1; again or Space stops) |
Two-finger tap on the trackpad · Control-click (Mac) | The clip's or voice bar's menu (the same as a right click) |
Trackpad pinch · Ctrl/⌘ + wheel | Zoom the timeline about the pointer |
Two-finger sideways swipe · Shift + wheel | Move the timeline left / right |
> < | Next / previous marker |
Ctrl+Shift+Up Ctrl+Shift+Down | Move the selected clip up / down a track |
Ctrl+Shift+Left Ctrl+Shift+Right | Nudge a text, overlay or voice clip one frame |
Ctrl+L | Loop playback (inside the I / O range when set) |
Opt / Alt + drag | Copy the clip while moving it |
? · the keyboard icon | The shortcut list: search a shortcut, click a row and press the key you want |
Alt+K Alt+L Alt+J | Add keyframes at the playhead / next / previous keyframe |
Ctrl+Shift+P | Show / hide the material panel (Tab stays the keyboard focus key and is never a shortcut) |
Ctrl+Shift+H · Ctrl+Shift+O | Home (the project grid) |
Ctrl+Alt+Q | Back to editing: closes Home, the lists, the full player and open windows |
Ctrl+, | Video Retouch settings |
Settings
In the Settings app choose Apps, then Video Retouch (inside the app: Ctrl+,).
| Setting | Choices |
|---|---|
| Export size | Source, 720p (the starting value of a new project) |
| Open the video when it is exported | On, Off |
| Draft folder | Where new projects are kept (empty: next to the first clip) |
| Auto-save | Every 2 seconds, 10 seconds, 30 seconds, 2 minutes, off |
| Default picture length | 1, 2, 3, 5 or 10 seconds |
More ways to export, your own shortcuts and the Home page
Type is the first row of the export window: Video, Audio only or GIF.
- GIF makes a looping picture without sound: 240, 360, 480 or 720 pixels high, 10, 15 or 20 frames a second, 256 colours. Short and small works best.
- Range: press
IandOin the editor to mark a part (orShift+Xto mark the selected clip), then choose Marked in the export window: only that part is made. This works for every type. - Cover: Playhead frame (or Clip › Set Cover at Playhead) or Picture… writes
<name>-cover.jpgbeside the video. It is a separate file, not inside the MP4. - Resolution goes up to 4K and 8K (8K only in the Mac app, with its HEVC encoder). The size line shows about how big the file will be. HDR and AV1 are not made; the picture is 8-bit SDR (Rec.709).
- An export now runs in the background: a strip under the toolbar shows the progress and the size so far, with Cancel; you can keep editing. The picture in the player waits until the file is done.
Shortcuts: ? or the keyboard icon at the top opens the list. Type to search by name or by key, click a row, then press the new key. × clears a key, ↺ brings the old one back, Reset all goes back to the standard keys. Keymap switches the whole set: NanumOS, CapCut or Premiere (it replaces your own changes). The menus show the keys now bound. A key you moved away does nothing at its old place.
Home: File › Open Project… (Ctrl+Shift+O) opens the project grid: a tile for each project with its name, date and size. Press one to open it; right click (or the three dots) for Rename, Duplicate and Delete (it asks first; the videos, pictures and music are never touched). New project, Import project… (a project file from anywhere) and the search box are on top. File › Save as Template keeps the project under My templates; pressing a template starts a new project from it. View › Layout has five arrangements (Default, Large media, Large player, Large adjust, Large timeline). Drag the dividers between the panels and above the timeline to size them yourself (the pointer changes over a divider; no panel can be made to vanish and the player always keeps a fifth of the width); a double click on a divider puts that one back to the default. Ctrl+Shift+F shows the player over the whole window and Esc brings the editor back. The layout is kept for next time. The assistant can set it too (the layout action: preset, pw, iw, tl).
How the layout works
- The three sizes are percentages of the window (media, inspector, timeline), so the layout follows the window. A drag changes a percentage each frame and the whole window is redrawn at once; the picture in the player grows with its panel.
What it cannot do
- Face retouch changes skin-coloured parts only. Finding a face to reshape it (slimmer, bigger eyes) and reframing around a face are not there yet (plan:
docs/qa/VEDIT-FACE.md). - MP4 / MOV are edited through an editing copy (at most 960 wide, 540 high, 15 pictures a second), which can look smaller than the original.
- On a phone (NanumOS Mobile) a video picked with "From this phone's photos and files" is made editable by the phone's own browser decoder (see below); an MP4 / MOV picked from NanumOS files cannot be edited on the phone yet. Which phone videos work: any size the phone can hold (tens to hundreds of MB; progress shows as a percentage; the sound is read up to 160 MB, a bigger file goes in without sound and says so). An iPhone HEVC .MOV works in Safari (the phone decodes it); where the browser cannot decode a format (HEVC in some Android browsers) the screen says "Save the video as MP4 and try again". A file with no type and no extension is recognised by its first bytes.
- The screen says "Reading the video…" at once. Where the browser says which frame it shows, the video is played once, muted at 4x, and the edit copy is made as the frames appear (a 20 s clip in seconds); where it cannot, or it stalls, the frame-by-frame seek continues. Play makes the next minute of sound as a file the browser plays; a missing folder for that file used to leave the preview silent, and that is fixed.
- Automatic subtitles work only in the NanumOS Mac app (the first 5 minutes, Korean or English, on the Mac itself, no internet). A device with no speech recognition of its own (a desktop that is not a Mac, the phone build) says "Not on this device yet" and sends the sound nowhere. There only the subtitle lines you write by hand.
- On a phone (NanumOS Mobile) music can only be a WAV file.
- Text to speech works only in the Mac app. Voiceover recording works where there is a microphone (the Mac app, a PC with a mic jack), not on a phone yet. Clip replace is not there yet; the reels "Fill" fits around a face only in the NanumOS Mac app (the Mac finds faces on the device); elsewhere it says "not on this device yet" and fits about the centre. Each clip gets one place - a moving face is not followed.
- A voice clip is heard only within the video's length (a part past the video's end is not exported).
What this app is
An app for cutting and joining videos. It works like cutting film and taping the pieces in order: your originals are never touched, and the app only remembers which part of which video is used, in which order. When you export, it makes a new video from that list.
How to use it
Follow "Try this" above. The window has the preview on top, the play buttons and a tool row in the middle, and the timeline below. The timeline rows are the video pieces, the titles and the sound. The red line is the playhead (the place you are looking at); click the ruler to move it. The next time you open the app, your project is there as you left it.
How it works
Why the copy's name is short: a file name on this device is at most 31 bytes, and a Korean letter takes 3 bytes, so a copy named after the original fits for an English name but can overflow for a Korean one ("사계 슬라이드-1aa45e8c.avi.part" is 37 bytes and could not be made). So the copy always has the same short name whatever the original is called (v- + an 8-digit fingerprint of the path and size), and the name people see is kept in the project. Think of numbered boxes in a store room with a ledger saying what is in each. Exported files and project files follow the same rule: a long name is cut on a whole letter and gets ~ + a 6-digit fingerprint, so two names never collide. If the conversion fails, the editor says why in plain words (storage, memory, an unreadable picture…).
An edit is a list of pieces. Each piece notes its original file, the part used and its volume; titles and music are noted the same way. Every action (keys, mouse, assistant) goes through one and the same command, so there is one undo history. That list is saved by itself every 2 seconds to a project file (<first video's name>.vedit.json); the videos themselves are not copied. Export makes a few pictures at a time so the window never waits.
Technical details
- Input: MJPEG AVI (every video frame a JPEG, sound 16-bit PCM). Pictures up to 1920×1080; up to 24 pieces and 12 titles.
- Pictures:
imgviewdecodes into 960×540 at most; one JPEG put in 45 times makes the 3-second piece (p-<hash>.avi). - Where it is taken: drops from Files and the desktop (
vedit_drop_path); the Import sheet is the kit's Open sheet withkd_places(place buttons, a formats line). The assistant'simport(path, at)andadd_sample(name)need no approval (one undo step). - Output: the same AVI kind + PCM sound. The size follows the first piece: "source size" or height 720 (width by ratio). Pieces of other sizes are fitted with their ratio kept, black around. Where the size is the same and there is no title, the original JPEG is copied without recompressing.
- Titles are drawn into the exported picture (white text on a dark band; Korean works); sound is each piece's sound × its volume + the music × its volume, mixed into one track.
- Music: a WAV is read as it is; MP3, OGG, FLAC and AAC are decoded by
play --wav OUT FILEinto a temporary WAV in/tmp(the phone version: WAV only). - The preview sound is made for one minute from the playhead.
- The project file is a small JSON (piece paths, parts, volumes, titles, music, markers). The undo history is 40 copies of the whole project.
- Code:
src/gui/vedit.c(window),src/gui/vedit_core.c(model, drawing, export; host-tested bytests/test_vedit_host.py).
How MP4 export works (Mac app, VEDIT-MP4)
Making a video file has two steps. Drawing every picture (cuts, text, transitions, mixing the sound) is done by the editor inside NanumOS, as before; pressing those pictures into an MP4 (H.264 and AAC encoding) is done by the Mac. Think of the editor writing the manuscript and the Mac being the print shop that binds it into a book. The Mac already has a fast part for this (VideoToolbox, a hardware encoder), so NanumOS carries no encoder of its own and the export is quick.
The flow: ① you pick MP4 in the export window and the editor tells the Mac app "1920×1080, 30 pictures a second, H.264, MP4". ② It draws the pictures one by one and sends each at once; the sound goes about a second ahead of the pictures (the Mac writes the two tracks in turns). ③ When the Mac has finished the file it sends it back into NanumOS and the editor writes it to the folder you chose. On the Mac there is only a temporary file, deleted at the end.
Try it: in the export window switch Format to MOV and Resolution to 720p - the size and the estimated file size in the line below change at once.
How MP4 export works without the Mac app
Making a video for YouTube, Shorts or Reels (the left panels and the bottom toolbar)
- Once a clip is in, the categories appear: Media, Audio, Text, Stickers, Effects, Transitions, Subtitles, Ratio. On a wide window they are a row of tabs over the left panel (left panel, picture and settings take about 4 : 3.5 : 2.5 of the width); on a narrower one they are a column at the left edge. A press switches the panel. Play and the time sit right under the picture; Export is at the top right of the window. The tool row over the timeline is, from the left: Undo, Redo | Split, Delete left (
Q), Delete right (W), Delete, Marker (M), Freeze, Duplicate, Speed, Crop, and at the right end Record, Snap and the zoom slider. Drag a file from the Media panel onto the timeline to put it there; press a template in the Text panel (title, pop, lower third, caption bar...) to put text at the playhead. - In Ratio pick Original, 16:9 (YouTube), 9:16 (Shorts / Reels), 1:1 or 4:5; the picture frame changes. 9:16 shows a safe area where a phone's own buttons cover the picture (it is not drawn into the exported file). Under Export for pick "YouTube 1080p", "Shorts / Reels 1080x1920" or "Square 1080x1080" and press Export; the progress and the file size are shown.
- The toolbar under the preview: Split, Delete, Duplicate, Speed, Crop (fill the picture), Undo, Redo, Snap (edges stick to clip ends and the playhead) and a zoom slider. The timeline shows thumbnails along each clip, the sound's shape, and tracks for text and shapes; the eye / speaker button on a track header hides or mutes it, the padlock locks it. Move the playhead (red line) by pressing the ruler or dragging it.
- The panel on the right follows what is selected. Clip: size, position, fill, speed 0.25 to 4x, volume, fade in / out, filter. Text: style, colour, size, position, motion in / out. Music: volume and fades. At a changed speed the sound's pitch moves with it. Select the second or a later clip, then use Transitions on the left to choose Dissolve, Fade through black, Slide, or Wipe. Drag Duration to set 0.1–5 seconds, no longer than the clip. Preview and export use the same transition.
Adding a voice (voiceover, text to speech, voice effects)
- Put the playhead where the voice should start and press Record in the toolbar (the mic button, or
R). A 3-2-1 shows, then recording starts: the video plays without sound and a red bar with the sound's shape grows on the Voice track at the bottom of the timeline. The mic button,SpaceorEscstop it. The first time you are asked whether the microphone may be used. - Recording again over an earlier take replaces only that part (punch-in). One
Ctrl+Ztakes the new take out whole and the earlier one is back. - Text to speech: the Audio category on the left › Text to Speech…: write the text and the Mac reads it on the device and puts it at the playhead as a teal voice bar (Mac app only; nothing comes out of the speakers).
- Select a voice bar and the right panel shows Volume, Voice effect (none, higher, deeper, robot, echo), Noise Reduction and Volume keyframes. Each change is one
Ctrl+Z. Drag the bar to move it, an edge to trim it (over an edge the pointer turns into ↔). A right click (two-finger tap) opens Split, Noise Reduction and Delete. - To work on a clip's sound by itself use Detach Audio in the clip menu (or the Audio tab on the right): the sound moves to the voice track and the clip is muted. Move to Overlay turns a clip into a picture in picture. Auto Beat (the Audio category › Auto Beat, or Add › Auto Beat) finds the music's beats and puts them on the ruler and on the music bar as light-blue dots; see "Auto beat and cut to the beat" below.
How the voice track makes its sound
Why this way? An effect baked into the file would leave files behind on undo and make a new file at every change. Computed, the history keeps only "effect number 3". Think of glasses over a photo instead of paint on it.
Technical detail: higher / deeper voices read two streams of 40 ms grains at 1.4x / 0.72x, half a grain apart, cross-faded: the length stays, the pitch moves. Robot is a 55 Hz ring modulator, echo two repeats 280 ms apart (45 %, 20 %). All of it is computed from the sample index alone, so a jump anywhere sounds the same. Try it: turn on Echo for a take and listen to the pause after a sentence; with it off that pause is silent.
Auto beat and cut to the beat
- Put music in (Audio › Add Music…) and press Auto Beat. The editor listens to the music on your own computer, finds the tempo (it tells you, for example
120.0 BPM) and marks each beat with a light-blue dot on the ruler and on the music bar. Nothing leaves the device; the result is kept in the project, so you only listen once. Ctrl+Z takes the marks back in one step. - Cut to Beat (the same panel, or Add › Cut to Beat) cuts to the music: choose Every beat, Every 2 beats or Every 4 beats. The selected clips are cut (all clips when nothing is selected): a video is split at each of those beats, a picture is shown until the next of those beats and the pictures after it follow, so a slideshow lands on the beat. One Ctrl+Z puts everything back. If there are no beat marks yet, Cut to Beat finds them first.
- Snap: while snap is on (the magnet button in the toolbar), dragging a clip edge, a title, a voice bar or the playhead near a beat pulls it onto the beat.
- The assistant can do the same: ask it to "find the beat" or "cut the clips to every 4 beats" (actions
beat_detectandcut_to_beat).
*The strength curve is compared with itself shifted in time: the shift where it matches best is the beat distance, and so the tempo (it prefers speeds near 120 BPM, so a slow 60 does not turn into a fast 120). Then it chooses the beat times with a score: a beat on a strong onset adds to the score, a gap that differs from the beat distance subtracts - the best chain of beats wins (dynamic programming), weak beats at the start and end are dropped, and each beat is moved onto the exact peak. Why this way? It is the classic method (Ellis, 2007) and needs no model or internet. Think of tapping your foot to a song: you feel the rhythm, then keep to it and ignore a stray noise.
Technical detail: src/gui/vbeat.h, integer only; 512-point FFT per frame, 32 log-spaced bands; the first 380 s of the music are read (23 ms frames every 11.6 ms); at most 768 beats; tested on click tracks at 90 / 120 / 128 BPM with jitter and noise (at least 95 % of the beats within 30 ms, tempo within 1 BPM). One tempo is followed through the whole music; the 24-clip limit stops a cut to every beat of a long video (the cuts made stay). A picture is the editor's 3 s still, so it is only shortened (up to 3 s).
Tracks, markers and long projects
Think of the timeline as rows of shelves. The main track is the shelf in the middle; text and overlay clips sit on shelves above it, voices and sounds on shelves below. If you put a clip where another one already is, it moves to a new shelf by itself, and an empty shelf goes away when its last clip leaves. Drag a clip up or down to move it between shelves (above the top one makes a new shelf). Click the + / − at the left of a shelf to fold it; right-click the left of a shelf to add, delete (empty ones only), move or fold it.
Markers: M puts one at the playhead. Right-click the ruler to name it, choose one of 8 colours, delete it or clear all; > and < jump to the next and the previous one. A project can have 500 clips on the main track and 256 markers.
More ways to work: drag a box on the empty timeline to select everything it touches; hold Opt/Alt while dragging a clip to copy it; right-click a clip for Replace Clip (keeps its speed and effects), Scene Detection (cuts where the picture changes at once) and Copy / Paste Attributes; hold Alt while dropping a media tile on the timeline to replace what it covers; the Timeline menu has loop playback and the preview quality (Full, 1/2, 1/4: only the preview gets smaller, the export does not).
Technical details. The selection is a bit set over all clips; the undo history copies only the clips in use; a track is a number on each item (
lane), saved astracks,ln,laneandmkmkeys that an older app skips.
Automatic subtitles (Shorts, Reels, YouTube)
- Open the Subtitles category on the left (the last one, a screen with two lines) and press Auto subtitles at the top. In the NanumOS Mac app the Mac listens to the speech in the video on the device itself (nothing goes over the internet). Choose the language spoken (Korean or English) first; a percentage shows. When it is done the subtitles appear as teal bars on the text track and in the list. The first 5 minutes are read.
- A subtitle has at most two lines of about 16 Hangul each and stays on long enough to read (0.9 s at least). Press one in the list to go there and select it; Edit text (
Enter) changes the words and the lines are laid out again. Drag a bar to move it, an edge to change its length. One Undo (Ctrl+Z) takes the whole automatic set back. - Look of all subtitles: "Shorts: big, centre" (big bold white with a black outline, low in the middle of the picture) and "YouTube: bottom" (white on a dark band). A 9:16 picture picks the Shorts look by itself. The look changes for all at once; select one subtitle to change its colour, size and place (top, middle, bottom) alone. In the Subtitles panel the three looks are one row of chips (Shorts, YouTube, Words) with a line under them saying what the chosen one does. Word by word is a third look: bigger text on one line, and the word being said right now lights up yellow (the reels style). Style of all subtitles + (the Subtitles panel, a folded button under Add subtitle - press it to open): Lines (one / two), Size of all subtitles, Position (top / middle / bottom), Text colour, Said word colour (the left swatch with a red slash = none). One change restyles every subtitle and the next ones; one undo takes it back. Changing the line count cuts them again by their word times (no listening again). Word by word starts with one line. Line rules: a line holds 16 Hangul (Latin-only text 42 letters on the YouTube look; one-line subtitles 10 Hangul / 20 letters). A line breaks after a comma or full stop first ("nice, | so…"), a number keeps the word after it ("30 minutes"), and punctuation never starts a line. A subtitle ends at a comma once it is half full, and always at . ? ! and at a pause over 0.7 s.
- Export burns the subtitles into the video. A .srt file of the same name is written beside it (in Movies); the Save .srt button saves one on its own too.
- Where there is no Mac app (a desktop that is not a Mac, the phone build) nothing on the device turns speech into text yet. The button says "Not on this device yet" and sends the sound nowhere (never quietly to a central server). Add subtitle writes one at the playhead by hand and it is the same kind of line: look, burn-in and .srt all work. Even in the Mac app the first use needs your permission in System Settings > Privacy & Security > Speech Recognition, and Machine > "Hear and read on the Mac" must be on.
You can also ask the assistant "make automatic subtitles for this video and export it for Shorts" (auto_subtitles, subtitle_look, export preset 2). Quiet speech or loud background sound makes some words wrong, so look through the subtitles before you export. "Make word-by-word captions" is make_captions (look word); "captions bigger, at the top, the said word green" is one caption_style card (size, pos, highlight). Neither asks; both undo.
Styling text and working on subtitles
Pick a look in two presses. Open the Text category on the left. At its top four tabs sit in a row: Basic (the first templates, the reels templates and your captions, as before), Styles, Word art and Templates. In Styles choose a group (Trending, Basic, Slanted, Retro, Neon) and press a look: with a text selected it takes that look (the words, place, time, size and animations stay); with none selected a new text with that look appears at the playhead. Word art works the same way (Glow, 3D, Curved). Templates are ready-made texts of ours with their place, size, look and animation: titles, lower thirds, lyrics, intros and outros, social names, prices, quotes and countdowns (a countdown puts one text per number, one after another). One Undo takes a press back.
The text inspector (on the right when a text is selected, after its font): B I U (bold, italic, underline), the fonts you installed under My fonts, Import font…, Letter spacing, Line spacing, Opacity (text), the colour swatches with an Eyedropper (press it, then click any colour in the picture), Outline (width and colour), Shadow (strength, colour, blur, distance, angle), Background (opacity, colour, corner radius), Effects (glow strength and colour, curve), the animations, and Apply to all (this text's look and animations go to every other text; their words, places, times and sizes stay).
Subtitle tools (the Subtitles category): Language spoken is a drop-down of 18 languages (the Mac app's recogniser listens in the one you choose; which of them the Mac can do on the device itself is the Mac's answer, and it is shown if one is not). Import SRT / LRC… reads a subtitle file (SubRip or lyrics with [mm:ss.xx] times) into subtitles; they replace the ones there and one Undo brings the old ones back. Merge with next joins the selected subtitle with the one after it; Split at playhead cuts the selected subtitle where the playhead is (between words, by the time). Find and replace… asks for the words and then what to put in their place (empty takes them out) and changes every subtitle; text that is not a subtitle is left alone. Re-sync to speech listens again and keeps your edited words, taking only their times from the new listening. Translate… says plainly that translating is not in this editor yet: the model that translates runs in the Translate app on this device, so copy the subtitle text there; nothing is sent anywhere.
How it works: the look is part of the text: every number is saved in the project (a project from before opens with the same look it had). A text with a changed look is drawn by the effects engine at its final size, letter by letter: bold takes the heavier face, italic leans each letter by a fifth of its height, spacing moves the letters apart, a glow is the letters blurred wide, made stronger and tinted, the shadow is the same shape moved by an angle and a distance, and a curved line puts each letter on a circle and turns it with the circle. Presets and templates are only a set of those numbers; nothing from outside is copied. The Lite (phone) version draws such a text plainly (no glow, curve or italic) and keeps the numbers.
Reels · speed curves · drag up to overlay · effects
Two places to import from — in the Mac app the first button is From this Mac (Finder, Photos, Downloads); in a desktop browser it is From this computer. On a phone there are two buttons. From this phone's photos and files (photo library, camera, Files app) opens the phone's own picker at the button you tapped; From NanumOS files (Movies, Pictures, Music folders, samples) opens NanumOS's Open sheet. The desktop has one: File › Import…. On a narrow screen the first button of the tool row, Import, offers both.
Make it a reel — Ratio › Reels in the left panel turns the project into a 9:16 1080x1920 one. "Fill: no bars" makes a wide video fill the tall picture (the sides cut off - in the NanumOS Mac app around the face: the Mac looks at three frames of each clip on the device and centres the biggest face; no face = about the centre. "Fill: no bars, around the face" is shown, and one undo goes back to the centre), "Blurred background" keeps the whole video and fills the bars with the same picture blurred and dimmed, "As it is: black bars" leaves black bars. A line tells which reel length (15, 30, 60 or 90 s) the video fits, or that it is longer than 90 s. Export Reel writes a 1080x1920 file to Movies (a wide project gets the blurred background first). The originals are never changed.
Speed and speed curves — select a clip, Speed tab on the right: 0.1x to 10x. Curves: Constant, Faster (0.5x to 3x), Slower (3x to 0.5x), Montage (1x, 4x, 1x). "Speed point at the playhead" adds a point there; with a curve the slider sets the speed of the point at the playhead. The sound keeps its pitch at any speed. One undo step each.
Drag up to overlay — drag a clip of the main track up onto the ruler / overlay row ("Release: overlay track") and it becomes a picture-in-picture at that time; drag an overlay clip down onto the main row and it is a main clip where you let go. One undo step each.
Effects — 6 transitions (dissolve, black, slide, wipe, zoom, flash), 8 filters (mono, warm, cool, vivid, soft, film, faded, drama), 6 text styles (band, plain, pop, caption bar, lower third, white box) and 3 reels templates (Text panel): Hook (big title, a subtitle place, a cut mark every 2 s), Vlog (lower third, a caption place, a cut every 3 s), Top 3 (title, then 3 2 1). All drawn by NanumOS: no outside pictures or fonts.
Cut out and mask (clip inspector, Video tab: Basic | Cut out | Mask) - Cut out takes a background colour out of the picture (a green or blue screen): press Green, Blue, Red or White, then set Intensity (how far from that colour is taken out), Edge softness and Colour spill (the colour's cast on what stays); the clips under it, or black, show through. Mask shows only a shape of the picture: Line, Mirror, Circle, Rectangle, Heart or Star, with Feather (soft edge), Size, Left / right, Up / down, Rotate and Invert. Both are saved with the project, undone like everything else, and drawn the same on screen and in the export. Not there yet: picking the colour from the picture with a dropper, dragging the mask on the picture, background removal without a screen.
Narrow screens (phones) — the tool row shows what fits; its last button More lists the other tools, the side panels and "Selected item…", which open as a sheet over the preview, closed with Done.
Videos that start black — a video that fades in (the sample 「사계 슬라이드」) is black at 0:00. Right after it comes in the preview shows its first moment that is not black, marked "Preview of 0:00.5 (0:00 is black)"; once the playhead moves or plays it shows the exact frame. The media tile shows that first moment too.
Photos — a photo is read in the background (the desktop never waits) and comes in as a 3 s clip when ready; tapping the same photo again meanwhile adds it once. If it cannot be read the message says why.
Phone videos — on NanumOS Mobile a video picked from the phone (MOV, MP4, iPhone HEVC) is turned into edit copies by the phone's own browser decoder (960 on the long side, 15 fps, mono 24 kHz), split into parts of at most 16 MB; if the browser cannot decode it the editor says so. An MP4 picked from NanumOS files still cannot be edited on the phone.
Technical details
- A speed curve is read as 64 equal pieces of the kept part, each at the curve's speed at its middle; timeline length = the sum of piece x 100 / speed, the same map for the picture, the sound, split and export (
vedit_core.c src_us). - Pitch kept by WSOLA (20 ms hop, 40 ms grains, triangular windows, a ±5 ms search for the best match with the previous grain).
- Blurred background: the covering picture averaged on an 18-wide grid, drawn back bilinearly, dimmed to 55 %.
- Phone videos:
weblite.js videoToEditseeks a<video>frame by frame, JPEG 0.75 from a canvas, sound bydecodeAudioData, written throughweb_avi_*(the same AVI asavi.c). Nothing leaves the phone. - Auto subtitles use the Mac's on-device recogniser only (
requiresOnDeviceRecognition = true, no network call - a test checks it).tests/mac_caption_offline.pyproves it: the recogniser run inside a box with all network denied (sandbox-exec (deny network*)) still hears the sentence (similarity 1.000), and while subtitles are made the Mac's speech processes (localspeechrecognition, corespeechd, assistantd, ...) open no network socket at all (nettop: 0 bytes). - Word times: each subtitle keeps when each of its words starts (
wt, ms from the subtitle's start, from the recogniser); Word by word lights the said word by them. A subtitle written by hand shares its time by letters. - Devices with no on-device recogniser (x86 desktop, phone build): a phone browser's Web Speech API sends the sound to a server in many browsers, so it is not used - "Not on this device yet".
Effects, filters, transitions and Adjustment
Apply to all — the button in each tab copies what the selected clip has (its last effect, its filter, the transition on the cut before it) to every clip of the main track: one undo step.
Apply to: Clip | Track — with Clip, an effect or filter goes on the selected clip as before. With Track, it becomes a clip of its own on the effects track: a row under the text row, 3 s long at the playhead. Press it to select, drag it to move, drag its right edge to change the length, Delete removes it. Whatever is under it (every clip, the overlays) gets the effect for that range. An effects-track clip has a Strength slider.
Transition position — in the Transitions tab, with a transition on the cut before the selected clip: Centred (half on each side, as before), On the clip before (it ends at the cut) or On the clip after (it starts at the cut). The total length stays.
Adjustment — the clip inspector's Adjustment part (and the Adjustment tab on the left) now has: Auto adjust (looks at the picture under the playhead and sets exposure, contrast, whites, blacks, saturation, temperature and tint a part of the way - a starting point, change what you like); Colour (temperature, tint, saturation), Light (exposure, brightness, contrast, highlight, shadow, whites, blacks), Effects (sharpen, clarity, fade, vignette, grain); HSL (hue, saturation, lightness for each of eight colours: red, orange, yellow, green, cyan, blue, purple, magenta); Curves (luma, red, green, blue: three points each, at the shadows, the middle and the highlights). Each slider of a clip has a keyframe ◇ with ◀ ▶ like the size and place. Reset puts everything back (with the keyframes); Save preset keeps the clip's Adjustment under a name (up to 8) and the Presets chips put it - or one of the 8 built-in looks - on another clip. In the Adjustment tab, a preset (or Add adjustment layer) becomes an adjustment layer: a clip on the effects track with its own sliders, working on everything under it.
On the phone (NanumOS Mobile) — the effects track, the grade and the new effects need the editor program, so they are drawn on the desktop only; a project that has them opens on the phone without them.
Technical details (effects, filters, Adjustment)
- The effect library is
src/gui/vedit_lib.h: ids 0..24 are the engine's (VFX_FX_*, so older projects keep working), 25.. are ours; the particle effects are one engine effect (VFX_FX_PARTICLE, drawn from the time alone: the same frame at the same time, preview or export) with a kind; the strobe isVFX_FX_STROBE. The new filters are tables of Adjustment sliders (brightness, contrast, saturation, temperature, tint, exposure, highlight, shadow, fade, vignette, grain, up to three HSL changes) - no outside look files. - The grade (tint, exposure, highlight, shadow, whites, blacks, fade, HSL, curves) is one function of a colour, baked into a 33x33x33 LUT (
vfx_grade_bake) and drawn by the engine's tetrahedral LUT lookup: one pass however many sliders are set. Brightness, contrast, saturation and temperature stay in the engine's colour-adjust effect (so older projects look the same). A keyed slider bakes the LUT again each frame. - An effects-track clip is an engine adjust clip on its own track (over the overlays, under the text):
vfx_clip_adjust. A clip carries up to 12 effect slots in the engine (it was 8); the editor remembers each slot it adds. - Transition position:
vfx_transition_mode(centred / front / rear window on the cut). - Auto adjust (
ve_adj_auto, integer): from every third pixel - the mean, the 1 % and 99 % luma, the mean saturation, each channel's share away from black and white. - Saved in the project:
adj=(15 values),gr=(24 HSL + 12 curve values),tm2=(the position), the slider keyframes (props 32..46 inkf=), and"fxc"(the effects track). An older editor skips what it does not know. Host test:tests/test_vedit_fx.py(pixel checks on flat colours); the screen:tests/gui_videoedit_fx.py.
Dressing up a clip: crop, align, background, mask, speed curve
Select a clip: the right-hand Video tab, Basic, has the parts below, and the player draws a box with handles around the clip.
- The player's box: drag inside it to move the clip. Near the centre and the edges it clings to light-blue guides. Drag a corner to resize, turn the round handle above it to rotate. One drag is one undo step.
- Uniform scale: switch it off to give the width its own size. Align: left, centre, right, top, middle, bottom put the picture's edge on the screen's edge. Apply to all: this clip's size, place, turn, crop, blend and opacity on every clip.
- Crop: Free, 1:1, 4:3, 3:4, 16:9, 9:16, 4:5, 5:4 crop about the centre to that ratio; the four sliders crop each side on its own.
- Blend: 20 modes (normal, add, multiply, screen, overlay, darken, lighten, colour burn, colour dodge, soft light, hard light, difference, exclusion, subtract, hue, colour, luminosity, linear burn, vivid light, divide).
- Stabilise, Denoise, Remove flicker: 0 is off, higher is stronger. Stabilise enlarges the picture a little so the edges stay covered.
- Background: black, blur (levels 1 to 4), colour, gradient, pattern, picture (the picture of the selected clip). The canvas ratio list (the Ratio tab) also has 4:3, 3:4, 2.35:1, 2:1, 21:9, 1.85:1, 5.8 inch phone and Custom (width and height).
- Mask > Pen: press Pen, click 3 or more points in the player, press Done. The mask's size, place, turn and feather take keyframes too.
- Speed tab: the curve is drawn as a graph (click it to put a speed point there). Presets: constant, faster, slower, montage, hero time, bullet time, jump cut, flash in, flash out. The Duration slider sets the speed that makes the clip that long, and Smooth slow motion blends the frames around each moment where the clip is slow.
- Keyframe curve: put the playhead on a keyframe to see its curve graph with two handles (click the graph and the nearer handle goes there), or press one of the 15 library curves (sine, quad, cubic, expo, circ, each in, out and in-out).
Ask the assistant: "crop this clip to 1:1", "a blue gradient background", "make it 21:9". Every change is one undo step.
Technical details
Stabilise, denoise and flicker work on the source frames before the effects engine sees them. Denoise is a 3 x 3 average that only mixes neighbours of a like colour; flicker is a gain that pulls the frame's mean brightness to that of the five frames around it. The saved project only gains new items, so old projects open as before. These parts are drawn by the desktop (where the engine is); the mobile (lite) preview keeps the old picture.
Face and skin retouch
Select a clip, then "Retouch": on a phone the button is in the bottom tool row (a panel opens where the timeline is and the picture stays visible above it); on a computer it is the fourth tab (Basic, Cut out, Mask, Retouch) at the top of the Video panel on the right.
- Natural / Bright: one press sets the sliders (Natural = smooth 35 · brighten 10, Bright = smooth 50 · brighten 40). Reset sets all three to 0; one undo brings the look back.
- Smooth skin (0-100): blemishes and fine lines soften while sharp edges - eyes, lips, hair - stay. Brighten skin (0-100): the skin gets lighter and a little less yellow. Sharpen (0-100): edges across the whole frame get crisper, less so on skin that is being smoothed so it does not turn rough.
- Only skin-coloured parts change. The app does not look for a face as such, so hands and necks change with it and a wall or a sweater close to skin colour may change a little. Reshaping a face (slimmer, bigger eyes) does not exist yet.
- Ask the assistant: "retouch the face naturally", "smooth the skin a bit more". Adjusting a look needs no approval and one undo takes it back.
- While a phone plays, the picture is drawn at half size to keep playback smooth, and drawn again at full size when it stops. An exported file is always full size.
Technical details
This is Photo Retouch's "Smooth skin" math cut down to a frame. The skin test is the YCbCr box (Cb 72-130, Cr 130-178, an 8-step soft edge) plus "red exceeds blue by 12-28" (so grey edges of compressed video are not taken for skin). Smoothing is a fast guided filter with luma as the guide (coefficients found on a small grid and brought back, He and Sun 2015), 70-30 % of the texture mixed back in. To run in realtime on the phone web (WASM) only luma is smoothed (the colour stays) and only blocks that are skin, or next to skin, are worked pixel by pixel. The radius is the picture's short side / 90 (2-16), so preview and export look the same. The saved project gets one entry, rt=smooth,brighten,sharpen;, so older projects open unchanged. Source src/gui/vedit_rt.h; tests tests/test_vedit_rt.py (what is drawn, background unchanged, preview == export) and tests/weblite_vedit_retouch.py (real taps on a phone, fps).
What this app takes and sends
Audio tools: loudness, equaliser, voice effects, ducking, sound effects
Everything here is worked out when the sound is played or exported - nothing is baked into your files, so undo, preview and export all hear the same thing.
- *It never lets the loudest peak go above -1 dBFS, so a very loud clip may end a little under the target. Off takes the gain away. Think of it as a volume knob that is turned for you to the right place.
- Enhance voice (0-100 %): takes the hiss out from between the words and makes the voice clearer by that much. 0 % leaves the sound as it was.
- Equaliser: twelve presets (Flat, Bass boost, Bass cut, Treble boost, Voice clarity, Warm, Bright, Loudness boost, Rock, Pop, Classical, Telephone) and five sliders for 100 Hz, 400 Hz, 1.5 kHz, 4 kHz and 10 kHz (-12 to +12 dB). Moving a slider makes it a custom curve.
- Pitch (-12 to +12 semitones) and Voice effect (None, Higher, Deeper, Robot, Echo, Chipmunk, Monster, Telephone, Megaphone, Tremble, Cave, Synth). The length stays. For a video clip's own sound, Speed › Sound pitch follows the speed lets the voice go high when the clip is fast, as a record does; off, the pitch stays.
- Volume keyframes on a video clip's sound: Keyframe at playhead, then move Volume at the playhead - a keyframe is made there. Fades: drag the white handle at the top corner of a selected voice clip or of the music bar, or use the sliders.
- Duck the music (Sound › Lower music under voice, 3-24 dB): while a voice clip (a recording, speech, detached sound) plays, the music and the video's own sound go down by that much, a moment before the voice starts, and come back after it ends. Sound effects do not trigger it.
- Beat marks by hand: Mark beat at playhead adds one, Clear beats removes all of them (also the ones Auto Beat found). Both can be undone.
- Sound effects (Sound › Sound effects): fourteen sounds in three groups - Transitions (Whoosh, Swipe, Riser, Glitch), Impacts (Thud, Boom, Clap, Shutter), Interface (Click, Pop, Beep, Ding, Coin, Laser). NanumOS makes them itself from sine waves and noise; nothing is recorded or copied. Press one to put it at the playhead as a voice clip. Music: the list below is the sound files in your Music folder; Add Music... picks any other file.
- The assistant can do all of it (
audio_norm,audio_eq,audio_enhance,audio_pitch,audio_fade,voice_effect,audio_keyframe,speed_pitch,duck,sound_effect,beat_mark,beat_clear).
*The equaliser is a 385-tap FIR filter built from your five gains (the gain between two bands follows a straight line on a log frequency scale). Ducking lowers the music by looking only at where the voice clips are on the timeline, so it needs no memory and a jump to the middle of the video sounds the same as playing from the start.
Technical detail: src/gui/vedit_aud.h (integer only; loudness in 0.01 LU against a float reference within 0.2 LU, the 997 Hz tone at -20 dBFS reads -23.05 LUFS where the standard says -23.01; equaliser within 1 dB of the preset at the band centres, 1.6 dB at 100 Hz). Settings are saved in the project as the aud line. Test: tests/test_vedit_aud.py.
Export without the captions burned in (CC-99-REST)
Ask the assistant to export with captions off: the picture is made without the caption text and the .srt file comes next to the video, so the captions can be added again in another app. Your project and its captions stay as they were.
NanumOS 0.1.8349 · 2026-11-16